
Replacing Siri with the ChatGPT API

When OpenAI launched the ChatGPT API this week I immediately wondered, “can I replace Siri on my iPhone with ChatGPT?”. This tutorial walks through how to replicate my not-quite production-ready, but workable attempt at swapping Siri for ChatGPT on my iPhone using the ChatGPT API, Siri Shortcuts, and Cloudflare Workers.
Before we get into things, this tutorial will require the following dependencies and services:
- An OpenAI account: If you don’t already have one, you can sign up for free.
- A Cloudflare account: If you don’t already have one, you can sign up for free.
- Wrangler: Wrangler is a command line tool for building Cloudflare workers. You can find installation instructions for it here.
- An iOS Device: Because we’re using Siri. Though if you want to hook up the ChatGPT API and Cloudflare Workers to something other than Siri this post will get you a lot of the way there.
- Node: If this is your first time working with node, you can get it here.
Setting Up Cloudflare Workers
In order for Siri to interact with our app we’ll need it to be hosted on a publicly accessible URL. Today we’ll be using Cloudflare’s serverless offering called Cloudflare Workers to accomplish this.
We can start our project by initializing it with wrangler.
wrangler init sirichatgptwrangler init does the work of creating a directory with some boilerplate code that will allow us to quickly run and deploy our code. When you initialize your project it’ll ask you a few questions, you’ll want to make the following selections:

The two key things are:
- We won’t be using TypeScript.
- We will be having it initialize as a Fetch Handler. This will add some boiler plate code that will let us make HTTP requests to our Cloudflare Worker and receive a response back.
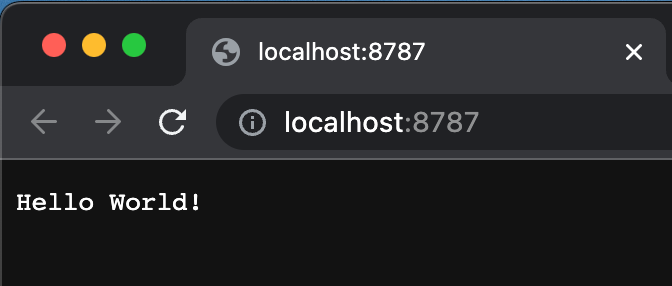
Once you’ve finished initializing our app and ensured you’ve logged in, let’s cd into the directory and run it locally to make sure our “Hello World” works:
cd sirichatgpt
wrangler dev
If this is your first time running wrangler dev, you’ll have to authenticate with Cloudflare. It may ask you to press l to run locally. You can press b to open your app in a browser. In the browser you should see Hello World!.
Wrangler will auto-refresh when you update any files in our directory so you can leave it running, and we can start slinging some code.
Calling the ChatGPT API from Our Cloudflare Worker
Open src/index.js and you’ll see the boilerplate code that wrangler created for us. You’ll notice it created a function called fetch, we’ll be adding our code to this function.
We're going to walk through the code step-by-step. If you're a fan of copying/pasting once, here's what index.js file will look when we're done:
export default {
  async fetch(request, env, ctx) {

    const data = await request.json();

    const messages = [
      {"role": "system", "content": "You are Ricky's helpful ChatGPT assistant"},
      {"role": "user", "content": data.question}
    ]

    var raw = JSON.stringify({
      "model": "gpt-3.5-turbo",
      "messages": messages,
    });

    const openai_api_key = "%YOUR OPENAI API KEY GOES HERE%";

    const requestOptions = {
      method: 'POST',
      headers: {
      	'Content-Type': 'application/json',
      	'Authorization': 'Bearer ' + openai_api_key,
      },
      body: raw,
      redirect: 'follow'
    };

    let result = await

    fetch("https://api.openai.com/v1/chat/completions", requestOptions)
    result = await result.json();

    console.log(result.error)
    return new Response(result.choices[0].message.content);
  }
};
Let's step through.
The ChatGPT API takes a series of series of messages as input so the first thing we’ll do is build out our messages array:
const messages = [
    {"role": "system", "content": "You are Ricky's helpful ChatGPT assistant"},
    {"role": "user", "content": "Will you come to my birthday party?"}
]
We can take that messages array and use it to create the data we’re going to send to the ChatGPT API:
var raw = JSON.stringify({
	"model": "gpt-3.5-turbo",
	"messages": messages,
});
Before we finish building our API request, we’ll need an OpenAI API Key. If you don’t already have one handy you can create one here. For the sake of brevity, we'll hardcode it into the code, but you should really set it as an environment variable.
We can now access our API key within our Worker script as a global variable. Now that we have our OpenAI API keys set we can build out our request options back in src/index.js.
    const requestOptions = {
      method: 'POST',
      headers: {
      	'Content-Type': 'application/json',
      	'Authorization': 'Bearer ' + OPENAI_API_KEY,
      },
      body: raw,
      redirect: 'follow'
    };
Let’s make our request, get the results and send them as the response to the HTTP request:
let result = await fetch("https://api.openai.com/v1/chat/completions", requestOptions)
result = await result.json();
Finally, let’s remove the boilerplate “Hello World!” response and replace it with the response from the ChatGPT API.
return new Response(result.choices[0].message.content);
*drumroll please*
The moment of truth – reload the page (if you stopped running wrangler dev you’ll have to run it again). You should see ChatGPT’s response to our question.
Note: If you’re not getting what you expect, you can add console.log(result.error) right before your return statement to see any potential errors you’re receiving from the ChatGPT API.
Once we know it’s working locally, we can deploy our code to Cloudflare by running:
wrangler publish --name sirichatgptThe first time you run wrangler publish it will have you register a workers.dev subdomain. You can name this whatever you’d like. After this command completes, it’ll give you the URL for your Worker. It will take the format of sirichatgpt.yoursubdomain.workers.dev. Make sure to make note of this because we’ll need it in our next step.
Connecting with Siri
It’s time to connect Siri to our Worker. Grab your iOS device and open the Shortcuts app.
NOTE: Before we get started I want to give a small disclaimer, this process is a little painful… it’s worth it once you get it done but the interface takes some getting used to and is a bit buggy. If you’re struggling to find something, I’ve found closing the Shortcuts app completely and restarting it often solves the problem.
Tap the plus sign to add a new shortcut, name your shortcut GPT Mode. The name is important because that’s the phrase you’ll use to activate your shortcut with Siri. Within this shortcut we’re going to add a series of actions that will allow Siri to make a request to our server and read the response back.
Then:
- tap Add action
- search for URL
- tap the “url” action. This action lets us define a variable with our URL. Insert the URL for your Cloudflare worker here.
Next search for the Ask for Input action. On that action, you can leave the input ask text and add the prompt of “GPT mode enabled. How can I help?”.
Most likely, there will be a suggestion to add “Get Contents of URL” showing up for you. If you don’t see it, you can search for it. I found this next part a little complicated so let me drop a video here to show you what to do:
The end result of your “Get Contents of URL” action will look like this:

Remember when I said this process can be a bit buggy? Trust me on these next steps. For whatever reason if you don’t do these three things then the next step won't work:
- Hit “done” in the top right corner of your Shortcut
- Close the app completely.
- Re-open the Shortcuts app.
The last action we’ll add is a “Speak Text” action. Because this action immediately follows a “Get contents of URL”. This should automagically set to Speak the Contents of the URL.

Now that we’ve added all of our actions we can test it by hitting the play button in the bottom right corner. The first time you hit play you’ll have to give iOS permission to make requests to your URL. After you’ve given permission you won’t have to again unless you make any additional changes to your Shortcut.
After hitting play, you’ll hear the response from GPT read back. But, you’ll notice it’s still reading the response to our hard-coded question. Lets head back to src/index.js to update our code to update our question dynamically. Right before we define our messages constant we can read our POST data and then we’ll delete our old messages array and replace it with this:
const data = await request.json();

// don’t’ forget to delete the old messages
const messages = [
	{"role": "system", "content": "You are Ricky's helpful ChatGPT assistant"},
	{"role": "user", "content": data.question}
]
After you’ve updated this code, do another wrangler publish because we need our public code to be updated for Siri to see it and try testing your shortcut again. This time it should respond dynamically to the question you ask. Now, if you activate Siri and say “Hey Siri, GPT mode”, or “GPT mode”, you can start talking with ChatGPT whenever you want.
Have questions or comments, please say “hi” - I’m @rickyrobinett on twitter.